Mounting a Bootable Raspberry Pi SD Card on a Windows PC
Summary
This page is one of a series of (hopefully) helpful Raspberry Pi notes - more of which can be found on the
Raspberry Pi Notes page and it details how to mount a bootable Raspberry Pi SD Card on a Windows PC.
The Backstory
After you have configured a bootable SD Card and placed an operating system on it using the free Raspberry Pi Imager software, you may wish to mount it on a Windows PC. Typically this is done in order to edit some of the config files on the SD Card prior to actually booting the Raspberry Pi with it installed.
The Problem
The problem is that the SD Card will not mount. The Windows PC simply does not recognize it and most of the time you see nothing. Sometimes I have found that you see a pop-up error window such as the one below.
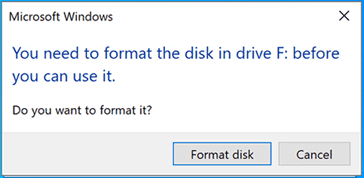
Warning: If you ever see a message similar to "You Need to Format the Disk in Drive F: before you can use it." when mounting a bootable Raspberry Pi SD Card do not say Yes. Doing so will erase the contents of the SD card and, what is more, the Raspberry Pi Imager software will probably not be able to work with the SD Card again until you repair the SD Card by using the SD Card Formatter from the SD Association.
Mounting a Raspberry Pi SD Card on a Windows PC
When the bootable Raspberry Pi SD Card is inserted into the Windows PC it will probably not be automatically recognized by the operating system. Don't worry, it really is there and it can be mounted as a normal drive. Here is the procedure to mount it.
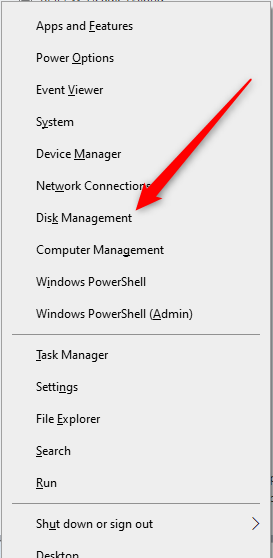
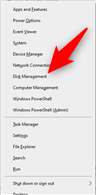
- Press the Win-X key and select the Disk Management option from the menu that pops up.
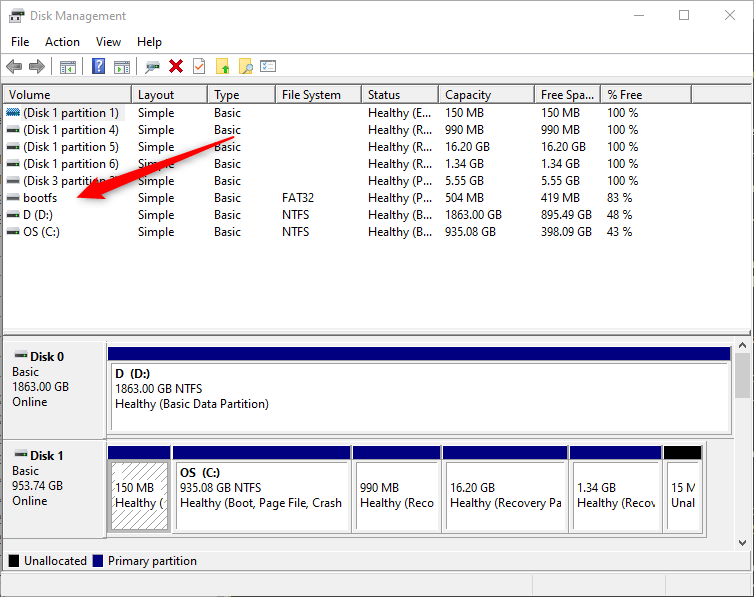
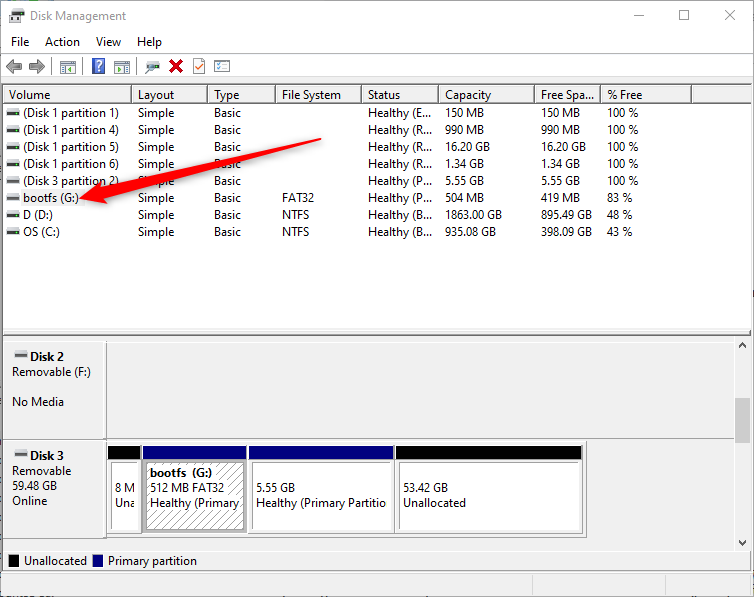
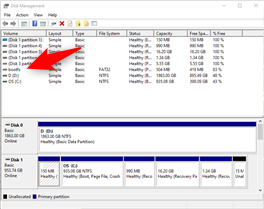
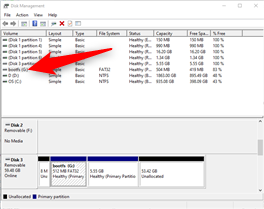
- This launches the Windows Disk Management tool. It should be able to see all disks on your system whether they are mounted or not. From the listed sizes of the drive you should be able to to determine which drive is the SD Card. On my system the bootable Raspberry Pi SD Card was labeled bootfs.
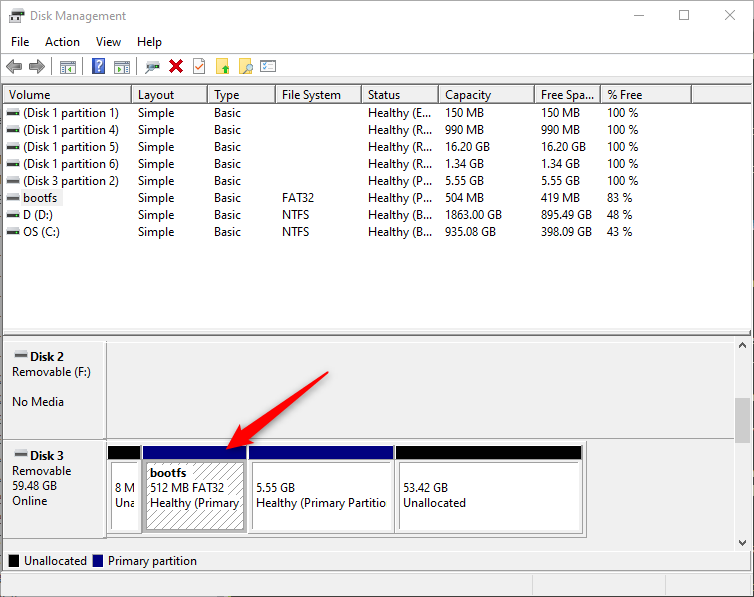
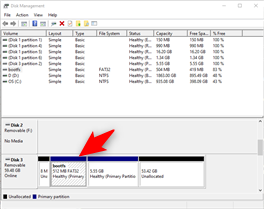
- Select the SD Card drive by clicking on it with the mouse. This will then display the partitions on this drive at the bottom of the Disk Management tool window. You will note that there are four partitions on the SD Card drive. The first is labeled "unallocated" and this is why the drive could not be automounted - Windows just looks at the first partition of the drive in order to mount it.
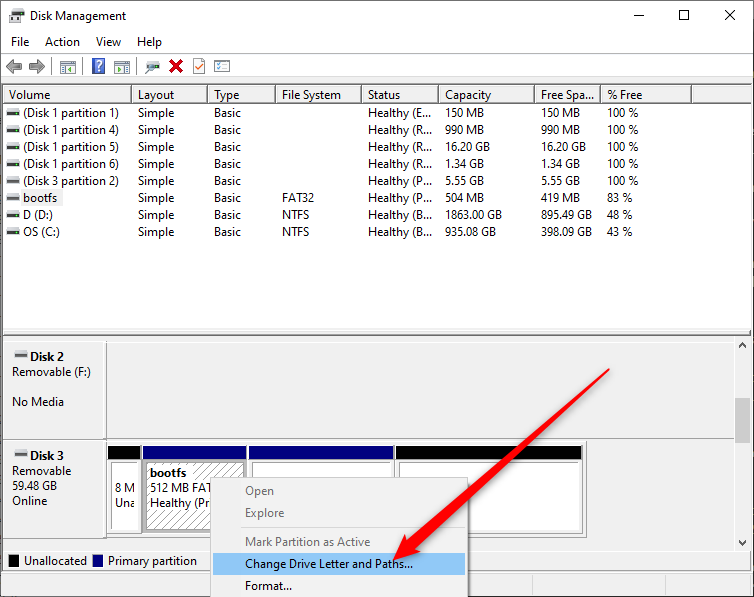
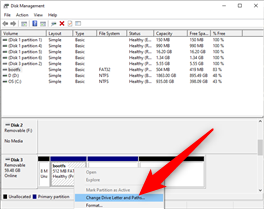
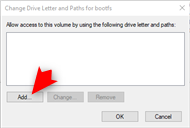
- The second partion can actually be mounted - if you do it manually. In order to do this just right mouse click on that partition and choose the Change Drive Letter and Paths... option from the menu that pops up.
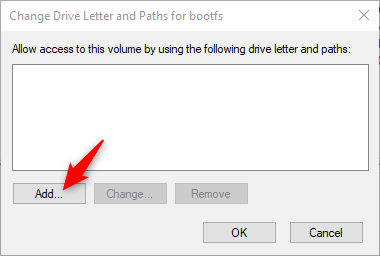
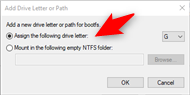
- A box will pop-up. Choose the Add option.
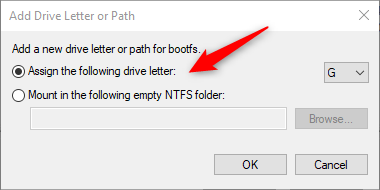
- The next step asks you to choose the drive letter. I just selected the automatic Assign the following drive letter option. In my case it just choose the letter G: for me.
- Once the drive letter has been assigned, the drive has been mounted on the Windows PC. You can see it now has a drive letter in the list in the Disk Managment software and if you start Windows Explorer (press Win-E) you will be able to see and access the files on the drive.
Warning: As a handy tip, do
not edit any files on the Raspberry Pi drive with the standard Windows Notepad editor. Notepad will mess up the line endings and corrupt the files. Use a proper text editor such as the freeware
Notepad++ to edit files like that.
License
The contents of this web page are provided "as is" without any warranty of any kind and without any claim to accuracy. Please be aware that the information provided
may be out-of-date, incomplete, erroneous or simply unsuitable for your purposes. Any use you make of the information is entirely at your
discretion and any consequences of that use are entirely your responsibility.
All source code is provided under the terms of the MIT License.