Setting a Static IP Address on a Raspberry Pi Zero 2 W
Summary
This page is one of a series of (hopefully) helpful Raspberry Pi notes - more of which can be found on the
Raspberry Pi Notes page - it details how, and why, you might want to configure a static IP Address on a Raspberry Pi Zero 2 W.
The Backstory
After configuration a Headless Raspberry Pi Zero 2 W, by default, connects to the WiFi network with a random IP address. The IP address is assigned by a DHCP Server present on the local net. In the case of home networks, the DHCP Server is usually the same box which connects the local area network to the wider Internet and provides the WiFi.
So, the Raspberry Pi Zero 2 W gets a randomly assigned IP address and, before you can connect to it, to you need to figure out what that address is. The page: (Setting Up a Headless Raspberry Pi Zero 2 W) details the process of discovering the randomly assigned IP address and connecting via SSH (Secure SHell).
The Problem
Most of the time the randomly assigned IP address will survive reboots of your RPiZ2W. This is because the DHCP server remembers the unique physical address of the RPiZ2W and gives it the same IP address when it requests one. This keeps things consistent. The problem arises when the DHCP server reboots (perhaps after a power outage). In that case, the old randomly assigned IP address is usually not remembered and a new one is generated for the RPiZ2W. This means that you probably have to do the
Ping Sweep procedure all over again.
This quickly becomes annoying and you might wish to have the Raspberry Pi Zero 2 W remember a specific IP addess and always use that one when it starts rather than requesting an IP address from the DHCP server.
A Raspberry Pi Zero 2 W configured to use a specific, hard coded, IP address is said to be using a static IP address. A DHCP server supplied IP address is known as a dynamic IP address.
Setting a Static IP address
Setting a static IP address on a linux system used be moderately complex - involving as it did the editing of configuration files. Howerver, the Raspberry Pi people have created a useful GUI (OK text based TUI) Network Manager tool that makes this procedure simple. It is called nmtui and it is included by default on all of the newer Raspberry Pi Linux versions. Really all the nmtui tool is doing is editing the same config files as you would normally do in a manual way - it just makes things simpler.
How do I Know Which Static IP Address to Use?
You can use any unassigned IP address on your local subnet. In most cases it is simpler just to use the dynamic IP address already automatically assigned by the DHCP Server. You already know that and are pretty sure that nothing else is using this address since the DHCP Server assigned it. It is OK to re-use it like this as there is nothing special about a DHCP server supplied address - they are just random unused ones.
Using nmtui to Set a Static IP Address
Here is the procedure to set a static IP address. Click on any image to enlarge it.
- First you need to know the static IP address you are going to set. In this example it is 192.168.1.177 - yours will probably be different.
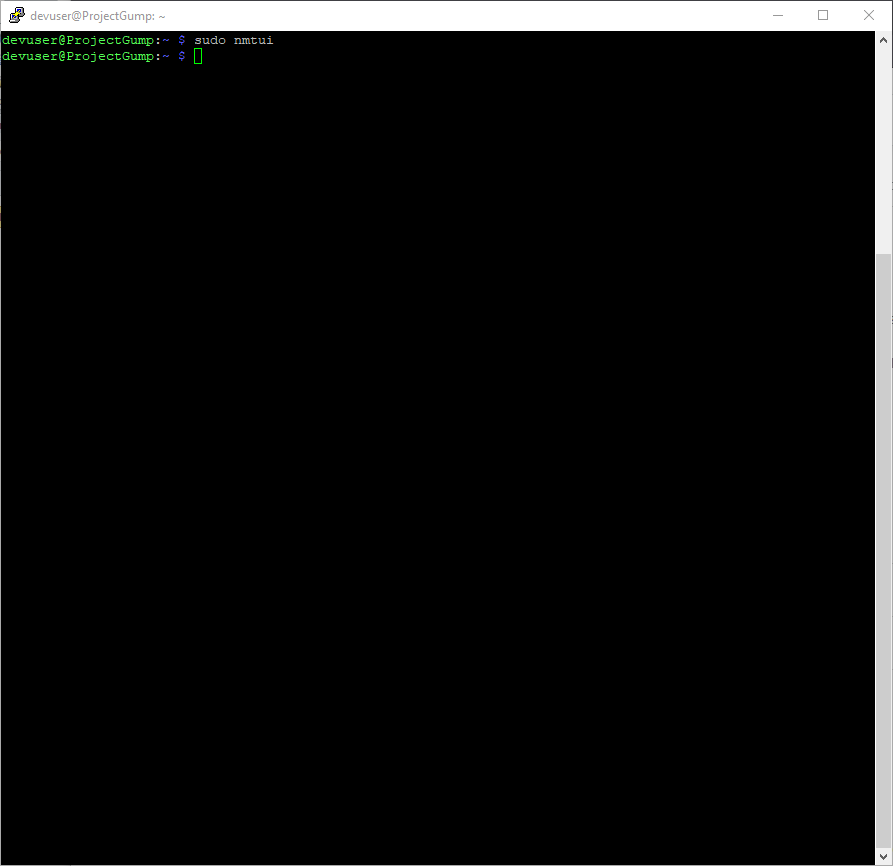
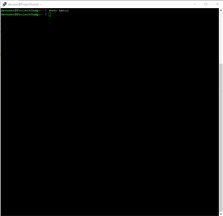
- In your SSH terminal session type the following command to launch the NetworkManager TUI: sudo nmtui. Note the sudo here is causing the nmtui command to run with root permissions. You absolutely need to do this.
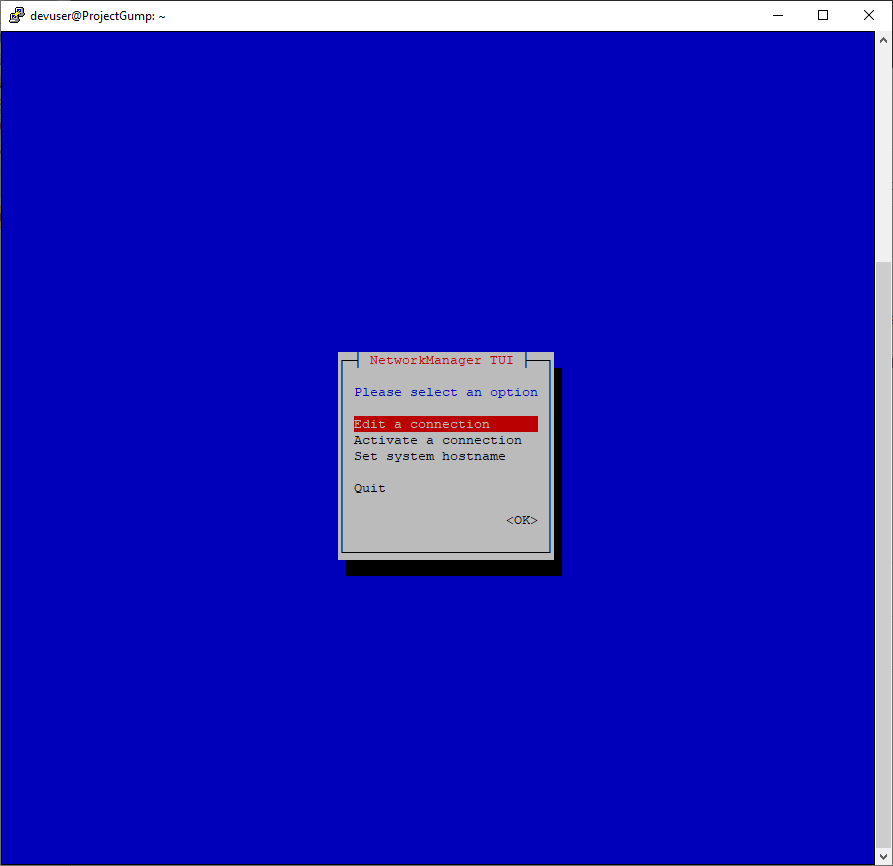
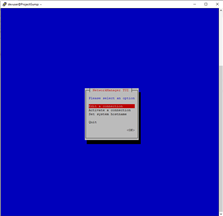
- You will see the Network Manager Text User Interface start. You already have a connection (you are connecting via it) so choose the Edit A Connection option. Use the arrow keys to navigate to the desired option and press the Return key to activate it.
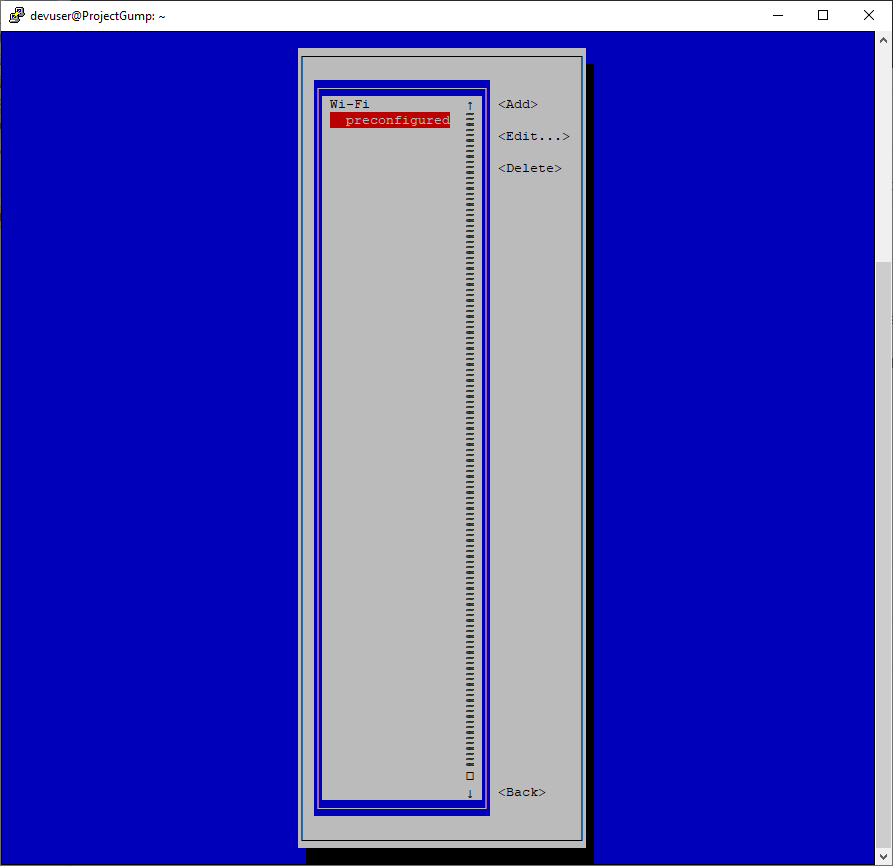
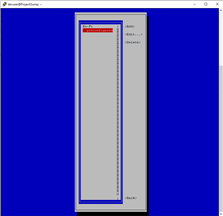
- On the next screen choose the preconfigured option. You might think you should choose the WiFi option - but no, you want to edit the one the Raspberry Pi Imager previously has set up for you.
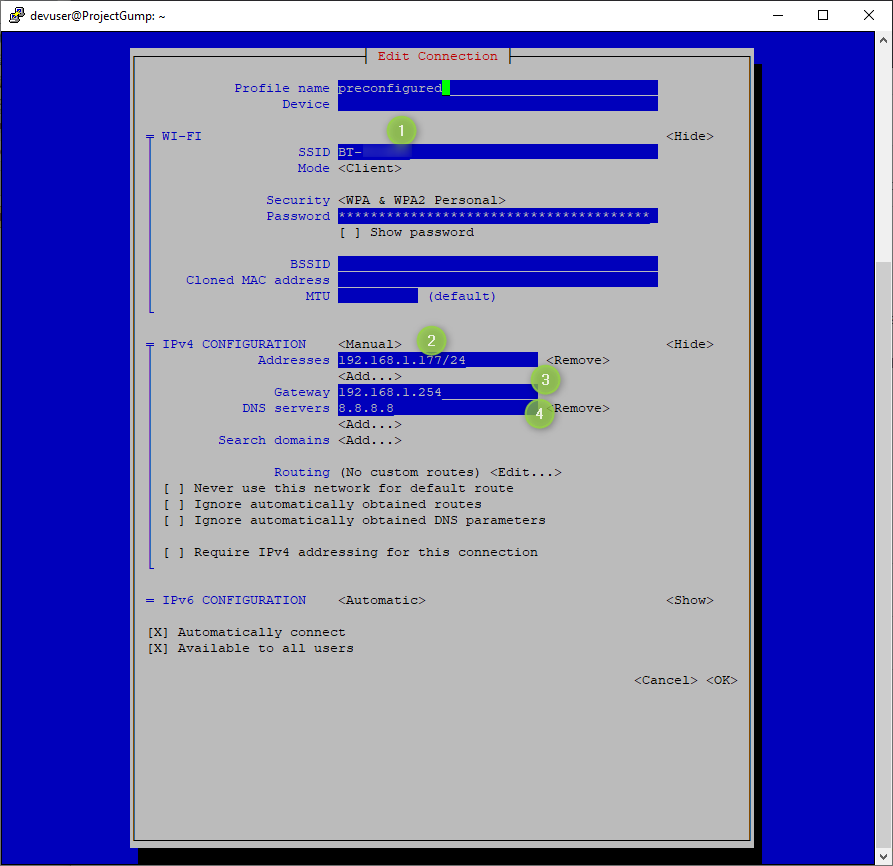
- The next screen is where you make changes. It should already be filled in with much of the required information - but you will probably still need to add some.
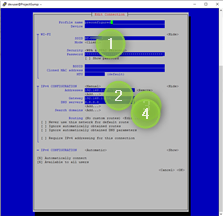
- In the Section marked SSID (highlighted as Section 1 on the image) make sure it contains the WiFi name to which you are connecting. I have blurred mine slightly for security reasons. It should already be set for you but you should check this in order to make sure you are not editing some other connection.
- In the Section marked Addresses (highlighted as Section 2 on the image) enter your chosen IP address in the format 192.168.1.177/24. The trailing /24 is a network mask and you absolutely need to append that.
- In the Section marked Gateway (highlighted as Section 3 on the image) enter the your local area network gateway IP address. If you don't know what it is try a quick netstat -r command to find it out. In my case it is 192.168.1.254.
- In the Section marked DNS Servers (highlighted as Section 4 on the image) enter the name server you wish to use. Most household Internet gateway routers are also DNS Servers so you can try re-using the Gateway IP address. Or, as in my case, you can just use 8.8.8.8 which is a public DNS Server supplied by Google.
- And that's it. Once you have entered the required information. Use the cursor keys to navigate down to the <OK> button and press the Return key.
The procedure is complete. If you set the existing dynamic IP address as a static one you can just carry on as before. Otherwise you will need to reboot the Raspberry Pi Zero 2 W and connect again via the new IP address.
License
The contents of this web page are provided "as is" without any warranty of any kind and without any claim to accuracy. Please be aware that the information provided
may be out-of-date, incomplete, erroneous or simply unsuitable for your purposes. Any use you make of the information is entirely at your
discretion and any consequences of that use are entirely your responsibility.
All source code is provided under the terms of the MIT License.